Tuesday, July 18, 2017

July 4th Camping and Black Pot Cooking


Hey Ya'll!
I hope everyone made the best they could out of  July 4th and whatever vacationing could be done. We sure did around here! 
We are not the go vacationing for the 4th kind of folks usually. Most the time to be quite honest we're usually working. It's very much took for granted that most people are off on typical holidays but honestly it's just not so. We are also limited greatly by the fact that we have animals. Someone must be able to tend and feed them.
Fortunately, we made our escape just over the hill and camped out the week. Several of the children were able to either pop in or camp with us the majority of the week.
Here's a few of the smiling faces.
Not a bad looking bunch for some river bathed campers.

We didn't go to a traditional campground but chose to rough it on some of the Ole Man's property. He wasn't sure about our whole endeavors considering he wasn't going to be able to stay more than a day or two because of work. He also was pained that we didn't do much more planning.
This man is a planner.
 This women is a go by the seat of you pants-er.
The first day we started out just picking a spot and beating down some field grass to set up camp. I know it could have been mowed or cleared first but hence the go by the seat of the pants part.
Me purchasing a 12-quart cast iron dutch oven and a hey...let's do it a few weeks before was the inspiration for this camping endeavors.
Within a few hours time, the Ole Man had this awesome fire pit built for me.
and the beans were on!
We initiated the black pot with 15 Bean Soup with smoked sausage.
It was so..so..good.
We had got rain during the day and being down on the creek made that warm stew a blessing.
Within the day, we had really turned into tent city.
I brought a few essential cast iron cookware for the week. I'm a believer in keeping the coffee on and not much beating some eggs in the morning. Truly, we did more eating than anything;
a good bit of of creek playing, hiking and foraging, 
we stumbled on a hallowed and forgotten home place.
I had a super time roughing it with my Jack Rabbit.
This was a wonderful way to spend the week. I am definitely hooked. I can't wait to do it again.

Thank you for stopping by for a visit.
Be Blessed!

Tuesday, May 2, 2017

Let's Talk Chicken


Hey and Good Morning!
I apologize for not posting in some time but sometimes life will keep a person busy. 
I thought I would put a post up explaining the basics of how we do chickens. I had been asked by a couple of folks lately, so I thought I might share a little bit about our chickens. 

Before I go any further, I want to make it clear me nor the Ole Man are experts. So I have no expert advice but we have been keeping chickens about 5 years now. As a child, we had a good number of chickens (100 chickens give or take) so I have a little basic knowledge to offer. 
With that being said there are so many different ways and opinions that are out there about keeping chickens. 
There really are no iron clad do's and don'ts. I say it will be something that will come along with a bit of a plan and a little trial and error.

My biggest message is to say:
Chickens are not hard!
My husband and I made the decision we wanted chicken. He got excited and began researching like crazy. I, on the other hand, had a pretty good idea of what I wanted and more over what
 I didn't want.
First, I didn't want a 100 chickens!
We both have full time jobs outside the home. We also had a house full of kids at the time and plenty of obligations. I'd love to think we could train them to have helped but that is something that must be instilled early with children. You might force them to help but they most likely will hinder more than help. We are a blended family. Our son Jack has grown up with them and is a good help and enjoys our hens.

Second, I didn't want chicken poop everywhere!
I'm a barefoot girl.
Free-range has good points and bad points. We became fond of having our first hens out and about. They were soothing and fun to watch. They kept the bug populations down. It was also good for their nutrition. When we let them free-range, I wore flip-flops and watched were I stepped and instead of fencing them in anything I didn't want them in had to be fenced in.
We lost our first hens to predators.
Then we would turn them out during the day and put the up at night.
Now we do the same but they are turned out into a fenced in area.

Here is the cute blue coop the Old Man built.
He search and purchased the plans. I think he  paid $10 for the complete plans. I am here looking through the folder and I have searched on line to find the website or any information to share with you. I can't find it. It was purchased on Ebay but must have been removed now.
I do have the plans for this 4' x 6' chicken coop if you request them. 
The material list is small and very efficient. very little waste if any of materials bought.

We chose to purchase 4 barred rock pullets. Barred Rock chickens are a very hardy breed. They weather the cold very well. Baby chickens are adorable but many times they just don't make it; they often die. It's also harder to tell the boys from the girls until they grow a little. We don't bother with a rooster. 
Roosters are not a necessity unless you want to raise chickens. 
We get 3 to 4 eggs a day as long as it's not too rainy for too long.
Our hens lay all winter.
Roosters can be a protector.
 They often can be mean and hard to deal with as well.

My chickens day starts when I let them out of their house when my son gets on the bus. I might take them some table scrapes or pull them some weeds or grass during the day. We feed and water them in the evening around supper time. That's also when I gather the eggs. We shut the house door at dark when they have gone in to roost for the night.

We feed ours Layer Pellets. That's what the first hens were already being fed. We tried ground feed once but it seemed they wasted more than they ate and it didn't last as long.

As far as collecting and keeping eggs, I wash mine with warm soapy(dish detergent) water. 
I store them in the refrigerator in old egg cartons.
Some people do not wash their eggs until they use them and they do not store them in the refrigerator they keep them at room temperature. This may be fine and something I would consider if I was forced to be without electricity but for me I wash them and keep the in cold.

Once a month or as needed you will need to clean your coop. I usually just get a rake and a shovel and lay them a new bed of straw.
It makes them get very excited and happy.

I hope I've shared something that will help you along the way.
If you have some questions just ask. I'll do my best to answer them.

Thank you for stopping by for a visit!
BE BLESSED!

Saturday, December 24, 2016

Country Christmas 2016


Hey ya'll!
I wanted to wish all of you a wonderful holiday season; 
one filled with family, friends, and plenty of home joys.
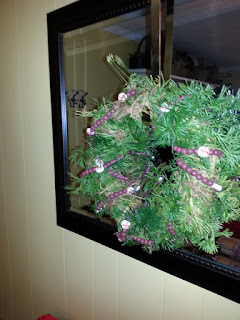
I hope your wreathes are hung. 
It could be you're like me and have a "wreath addiction."
Jack made this one. He makes me happy when he wishes and asked to go to the woods with me. We just make them simple. Those are the ones I seem to prefer.
I'm keeping a a little Pioneer Woman love going with this beautiful Christmas tablecloth.
I'm never quite through until Christmas. I'll see some spot, I think needs one then I slip down in the woods to make them. I may be done at this point seeing as it's looking like quite the rainy day.
The Ole Man got me excited when he left out for work. He popped his head back in to tell me it was spitting snow. 
It was!
But it quickly turned to rain.
 I'm proud of this little plant here. The Ole Man gets me a poinsettia every year. Some years, they are more resilient than others. This one survived the the winter and the summer. When Autumn set in the leaves started turning the brilliant red. It's not full blown red but it's quite beautiful. I let a cold snap freeze out a little portion. Oops!
I added the rhododendron and a little this and that to disguise the zapped part.
  Here's ole St. Nick peeping out from one from this year. It's very red.


We put the fish in a big old pickle jar. We thought they needed some Christmas, too.

I couldn't help but make another country apron for the season.
I think this has lead me to the end of my post.
 It's Christmas Eve!
Jack & I have cookies to bake.


Merry Christmas!
Be Blessed!


Saturday, October 1, 2016

The Old Singer Pedal Sewing Machine and Some Other Retro Goodies

Hey Ya'll!
I hope everyone's weekend is shaping up nicely.

I thought I'd throw a quick post out on this beautiful Saturday evening.
I 'll be heading on to the work place in a little while but I thought I'd share some of my vintage loves 
that's become part of my home lately.

My Singer Pedal Sewing Machine is my new most favorite!
Like so much I won't to look at it and run my hand down it's worn grain.

I have a special love for them because I watched my Grandma Hylton sew on hers so often. All her quilt's were pieced on one so very similar.
Grandma's is still remains in the home it that it called home but now I have finally found one of my own.


I've found them before but opportunity didn't meet many before but all the stars aligned this time and I assume it was all meant to be.


Here it is as we unloaded it off the Ole Man's truck.
I came across it at a local sale that's put on in the community during Labor Day weekend.

It's was quite a find for me.


The cabinet is in a little better shape than Grandma's and the gold labeling is all in tact but much more worn than.
It's found it's home in the front room along with Priscilla, my dressform.


This little straight back chair isn't mine but I couldn't resist sharing what Mama had been up to.
The chairs were Grandma Hylton's as well but the seats had completely seen there better days 
so..
Mama put her hand too them with these new jute seats.
I think they are adorable!


Here's my ugly little lamp I picked up.


I couldn't resist because of the map shade.
LOL..the rest of it was ugly though.


This isn't much of a picture but here the lamp sets 
beside the wing back chair 
after a shot of the cheapest flat black spray paint 
that can be purchased.


Well..think..think..think..I can't remember anything else vintage-y 
to share at the moment.
I thank you for stopping by.

Be Blessed!


Friday, September 30, 2016

DIY Vintage Fabric Pumpkins

Hey Ya'll 
&
Happy Fall to ya!
I hope that all is well with everyone and that the fall crafting bug has bit you too. I don't know why it has taken me so long to get this project done. I been wanting to do it for so long but I just never seemed to get around to it.
Well.. I finally did it and it's one of my favorites and it was so..sooo.easy!
It all started by saving last years pumpkins stems for the one we carved.
These pretty awesome fabric scraps I found in the scrap bin at work.
I have seen pumpkins done in all kind of wonderful fabric like velvet, ticking, burlap..and so on but I didn't have any that just screamed pumpkins to me.
Lol..I don't know why these did...
I really just thought the fabric had such a vintage feel. Especially, the green one, it reminded me of the drapes that hung in our babysitter Mrs. Hall's home.
I think that's one of the most important parts to doing true DIY's with vintage feel. It's finding fabrics in maybe unsuspecting placing and saying that would look great as..whatever your fancying. I suggest keeping an eye out at Goodwill and consignment type stores. Most the time there is some real funky kind of fabrics there that just need to be recreated.
As you know with me the main thing is to do it on the cheap! 

Yes..I'm sure I'm cheap!
The subject of me being cheap leads me to show you what I used as stuffing for these pumpkins.
I used my scrap fabric. 
You know it's got places or been cut to giblets to the point there's nothing to save. I find that it's the perfect stuffing for alot of the vintage-y crafts. It will be pretty heavy and lumpy.
I don't know why I find that to be about perfect for imperfect craft.
If it was something done way back in the day that's what they would have done.
Don't ya think?? 
Basically, lay your fabric out.
Then find something big and round for your pattern. I used my Rada Pizza Stone for the big green pumpkin.

I also got my thread and a pretty big needle and scissors.
You'll need to do some basting.


Baste stitch all the way around your circle edge.
Then gather. 
This is where it went a little wrong. When I started gathering. My thread broke. I could tell this was not going to be my option.
I needed something stronger that would hold.


So I pulled out the good ole dental floss.
It's very strong and it will work fine.


Gather and Stuff
After you stuff, Stick your stem in and pull the fabric tight around it.
I also tide some raffia around the stem. It sort of hides the gathers and just adds to the look.

That's about all there is to it.
I hope you'll give this DIY Fabric Pumpkin Project a try.
As always, thanks so much for stopping by for a visit.

BE BLESSED!