Showing posts with label country decor. Show all posts

Saturday, December 24, 2016

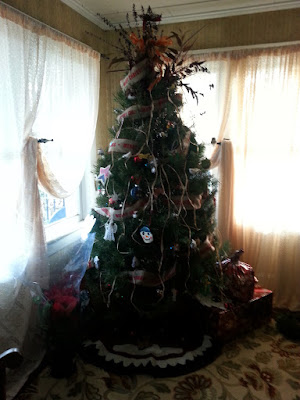
Country Christmas 2016


Hey ya'll!
I wanted to wish all of you a wonderful holiday season; 
one filled with family, friends, and plenty of home joys.
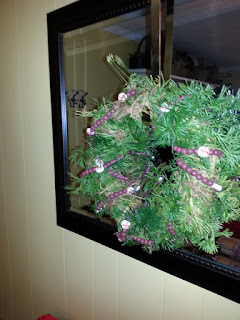
I hope your wreathes are hung. 
It could be you're like me and have a "wreath addiction."
Jack made this one. He makes me happy when he wishes and asked to go to the woods with me. We just make them simple. Those are the ones I seem to prefer.
I'm keeping a a little Pioneer Woman love going with this beautiful Christmas tablecloth.
I'm never quite through until Christmas. I'll see some spot, I think needs one then I slip down in the woods to make them. I may be done at this point seeing as it's looking like quite the rainy day.
The Ole Man got me excited when he left out for work. He popped his head back in to tell me it was spitting snow. 
It was!
But it quickly turned to rain.
 I'm proud of this little plant here. The Ole Man gets me a poinsettia every year. Some years, they are more resilient than others. This one survived the the winter and the summer. When Autumn set in the leaves started turning the brilliant red. It's not full blown red but it's quite beautiful. I let a cold snap freeze out a little portion. Oops!
I added the rhododendron and a little this and that to disguise the zapped part.
  Here's ole St. Nick peeping out from one from this year. It's very red.


We put the fish in a big old pickle jar. We thought they needed some Christmas, too.

I couldn't help but make another country apron for the season.
I think this has lead me to the end of my post.
 It's Christmas Eve!
Jack & I have cookies to bake.


Merry Christmas!
Be Blessed!


Saturday, October 1, 2016

The Old Singer Pedal Sewing Machine and Some Other Retro Goodies

Hey Ya'll!
I hope everyone's weekend is shaping up nicely.

I thought I'd throw a quick post out on this beautiful Saturday evening.
I 'll be heading on to the work place in a little while but I thought I'd share some of my vintage loves 
that's become part of my home lately.

My Singer Pedal Sewing Machine is my new most favorite!
Like so much I won't to look at it and run my hand down it's worn grain.

I have a special love for them because I watched my Grandma Hylton sew on hers so often. All her quilt's were pieced on one so very similar.
Grandma's is still remains in the home it that it called home but now I have finally found one of my own.


I've found them before but opportunity didn't meet many before but all the stars aligned this time and I assume it was all meant to be.


Here it is as we unloaded it off the Ole Man's truck.
I came across it at a local sale that's put on in the community during Labor Day weekend.

It's was quite a find for me.


The cabinet is in a little better shape than Grandma's and the gold labeling is all in tact but much more worn than.
It's found it's home in the front room along with Priscilla, my dressform.


This little straight back chair isn't mine but I couldn't resist sharing what Mama had been up to.
The chairs were Grandma Hylton's as well but the seats had completely seen there better days 
so..
Mama put her hand too them with these new jute seats.
I think they are adorable!


Here's my ugly little lamp I picked up.


I couldn't resist because of the map shade.
LOL..the rest of it was ugly though.


This isn't much of a picture but here the lamp sets 
beside the wing back chair 
after a shot of the cheapest flat black spray paint 
that can be purchased.


Well..think..think..think..I can't remember anything else vintage-y 
to share at the moment.
I thank you for stopping by.

Be Blessed!


Friday, September 30, 2016

DIY Vintage Fabric Pumpkins

Hey Ya'll 
&
Happy Fall to ya!
I hope that all is well with everyone and that the fall crafting bug has bit you too. I don't know why it has taken me so long to get this project done. I been wanting to do it for so long but I just never seemed to get around to it.
Well.. I finally did it and it's one of my favorites and it was so..sooo.easy!
It all started by saving last years pumpkins stems for the one we carved.
These pretty awesome fabric scraps I found in the scrap bin at work.
I have seen pumpkins done in all kind of wonderful fabric like velvet, ticking, burlap..and so on but I didn't have any that just screamed pumpkins to me.
Lol..I don't know why these did...
I really just thought the fabric had such a vintage feel. Especially, the green one, it reminded me of the drapes that hung in our babysitter Mrs. Hall's home.
I think that's one of the most important parts to doing true DIY's with vintage feel. It's finding fabrics in maybe unsuspecting placing and saying that would look great as..whatever your fancying. I suggest keeping an eye out at Goodwill and consignment type stores. Most the time there is some real funky kind of fabrics there that just need to be recreated.
As you know with me the main thing is to do it on the cheap! 

Yes..I'm sure I'm cheap!
The subject of me being cheap leads me to show you what I used as stuffing for these pumpkins.
I used my scrap fabric. 
You know it's got places or been cut to giblets to the point there's nothing to save. I find that it's the perfect stuffing for alot of the vintage-y crafts. It will be pretty heavy and lumpy.
I don't know why I find that to be about perfect for imperfect craft.
If it was something done way back in the day that's what they would have done.
Don't ya think?? 
Basically, lay your fabric out.
Then find something big and round for your pattern. I used my Rada Pizza Stone for the big green pumpkin.

I also got my thread and a pretty big needle and scissors.
You'll need to do some basting.


Baste stitch all the way around your circle edge.
Then gather. 
This is where it went a little wrong. When I started gathering. My thread broke. I could tell this was not going to be my option.
I needed something stronger that would hold.


So I pulled out the good ole dental floss.
It's very strong and it will work fine.


Gather and Stuff
After you stuff, Stick your stem in and pull the fabric tight around it.
I also tide some raffia around the stem. It sort of hides the gathers and just adds to the look.

That's about all there is to it.
I hope you'll give this DIY Fabric Pumpkin Project a try.
As always, thanks so much for stopping by for a visit.

BE BLESSED!


Wednesday, June 1, 2016

Queen Bee Country Apron

Hey ya'll!
Happy June 1st!

I've got the sewing bug again. 
Today it's this ruffled, very natural country apron with my new obsessive queen bee stencil.

Almost ever since I have been whipping stuff up in the kitchen, I have usually kept an apron hanging up. 
I know my love for aprons comes from watching my Grandma Hylton bustle around in the kitchen hair bunned and apron on.
But ...
I have sometimes been reluctant to put it on.
A lot of times, I just had something country-style with some gingham or calico print; sometimes they would simply tie around the waste; sometimes they would be ones that would be more similar to this one as to slipping over the head. 
I would be well into my recipes or the dishes before I'd remember to tie and slip one on. 
Lately, I have become much more obsessed with tying an apron on. It simply saves my clothes.
I have been cheating quite a bit lately and just cutting a apron out of some scrap fabric and tying it on...no hemming..no anything. When it became soiled I would ball it up and through it in the trash.

A few weeks ago, I clocked into work and was getting ready to get busy when a co-worker asked my what was all over my shirt. I couldn't see anything but when I went to the restroom and looked in the mirror I had grease splatters all over the front of my shirt. 
I  looked dang messed up!!
Since then I made me a quickie apron with the bib to be sure to keep things off my top.
The quickie was more aggravation than anything because I simply didn't do it right.
With all that lead in...
I finally took the time to make one bonafide! 

Priscilla(dressform) was kind to model as I patterned it out. I fashioned some great big pockets on the front. 

It has crossback straps to easily slip over my head.
I chose this natural looking fabric from my stash, a favorite of mine lately.
I thought why not go ahead and add the ruffle...
and the bee stencil.
Well there you have it!
You can see what I've been up to today...
What projects have got you going today?

As always 
Thank you for stopping by for a visit.
Be Blessed!

Sunday, May 29, 2016

A Little Red, White and Blue


Remember the Fallen for this Memorial Weekend


Be Blessed!


New Paint for Our Old Bathroom

Hedgegrow Olive Glidden Paint with Stencil
Good Sunday Morning!
I am hoping ya'll had a wonderful and productive week.
Work has been slow at the plant so my department has had to take some additional time off.
Being big on time and short on funds was bringing me down. 
Looking at the state of my bathroom was also bringing me down. Instead of focusing on what I couldn't get done I just went at the week and the bathroom with the do the best with whatcha' got mentality.

We only have one bathroom in our home; so through the years it has been used to a frazzle.
Between the kitchen, the kids rooms and the bathroom I don't know which has been repainted and repaired the most but I'm pretty sure it's been the bath. When most of the kids was home it would take some strategic planning to get anything done in here. I could have done well to have installed a revolving door . Now we're down in numbers to just The Ole' Man, Jack and Me. Getting things accomplished and keeping them that way is becoming a bit easier. 

I think I have surely avoided taking pictures in the bathroom so to show some real good before and afters I'm not going to be able to do. 


Honestly from looking at this picture it doesn't seem that there was a change in color at all.
Previously my walls was much more blue in tone.
To tell the real truths, the last time I painted I mixed a half a bucket of dark blue paint I had used in Jack's bedroom with a smidge of yellow paint I had left over from painting the kitchen walls. I don't know what color I could actually claim it to be but it was definitely blue.


Our bathroom was old and when I first moved in we didn't even have a shower. With that being said when the shower was added a vent fan should have been added as well.
But it wasn't...
So fighting mildew has been a real struggle.
Someday, I'm sure the ol' man will do it but until then the fight continues.
Above the shower was yucky!!
I can't even show a before picture because it was yucky!!
I would have gone nuts overs a picture of that. Even after trying numerous cleaning products and hacks off pinterest, after being cleaned the paint remained somewhat stained. 
The Best cleaning hack for cleaning mold and mildew I found was plain old Hydrogen Peroxide.
I would buy the big bottle in the health and beauty department and mix about a half a bottle with two big squirts of liquid dish soap in a smallish bucket of warm water. then scrub like crazy. 
It did do a good job of cleaning it.

The next big deal with this little redo was the ol' man researching the heck out of the internet and reading, who only knows how many reviews for a good primer.
What he found and bought was Zinnser's Mold Killing Primer.
Zinnser's primer was the only primer that not only claimed to cover up stains from mold and mildew but claims to continue fighting it.
The price for this primer was about $35 at our local home improvement store. 
It definite covered well and I'm feeling good about it's claims.
If  I become a doughter  I'll let you know.


For my wall color I chose Pacific Pines Sage.  
It's one of Glidden's Paint colors 
but 
to save on the dollars, I went with the Color Place Paint from Wal-Mart. Most the time I have used it in the past and it's seemed to do as well as when I've paid more for higher priced paints.
It turned out to be a true green, which I was looking for.
I trimmed out my doors and painted the ceiling with white gloss enamel. I didn't repaint my doors.


stenciled cabinet


The sink vanity I painted Hedgegrove Olive. Also a glidden color with Color Place Paint. 
I wish you could see the contrast as well in the picture as in person. It was definitely darker green but still gave a good harmony to the room.


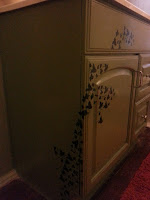
I have been addicted to the stenciled and distressed furniture for some time now but an artist and a painter I'm not so I aided myself with a stencil to add the Ivy that runs up the side of the cabinet.
I lightly sanded the edged and a little here and there before the stenciling began.
I also gave the stencil and the bare wood a spray or to of clear enamel paint to just seal it from the moisture that's prone to be in the room.


Thank you for stopping by for a visit!

As Always
Be Blessed!

Monday, April 25, 2016

Flour-Sack Hand Towel DIY

Good Monday!
I  think I'm going to ramble for a sentence or two and then I'll give you 
the low-down on
My (faux)Flour-Sack Hand Towels.

I hope every ones weekend was a wonderful one. I can truly testify that mine was. We had a lazy Saturday here around the house. I had some wants to run off to a Vintage and Greenliving show just down the road but it just didn't go that way.
My Sunday I enjoyed going to my sister's church for the baptism of her daughter. 
It was truly uplifting and I do have to say I enjoy her church family!

I started out today feeling very positive. You know how that goes this world we live in 
will do it's best to steal that joy..uggh..LOVEe thy Neighbor..Right?

But I got back on track and finished up this little DIY.

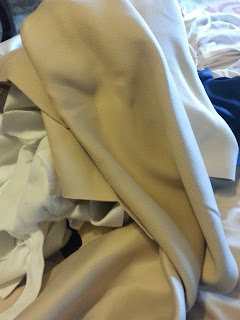
I started out with this beige and very natural fabric I found. 
It is very soft and absorbent. I've incorporated it for some time in many projects.

My thoughts are that I really do like the grainsack, feedsack, or floursack designs and look but those clothes would not truly be enjoyable to use as a hand towel, even though I bet in times past the nice terrycloth towels we use today were not used. 
I'm sure these clothes were used more times than not.


Here I go again with my handy stencils and sharpie.

I taped my lines with some regular scotch tape 
and 
colored in my lines.
I then added some lettering.

Afterward I simply turned the sides and straight stitched them and cut about a 2 inch black strip of cloth;
Sewing it to the ends for binding.


This was my first go around at this project. I feel like I'll be tweaking and trying it again. 
Especially since I ordered some stencils this weekend with this DIY in mind.
My Ole Man doesn't have any idea about this one yet.
It's fun to see his face with some of my zany projects.

Thank you for the visit!
Be Blessed!


Thursday, April 7, 2016

A little Americana


Good mornin'!
Well I've been at it again. 
Have you ever just did something on the whim and wasn't sure how it was going to go over with everyone? 
Well that's what this one was.
I've had this eagle above the sink for a couple of three years but when I repainted the cabinets it seemed like he just needed something else. 
So..I added a little Americana to him.

More stenciling and a sharpie; then a little sanding.

I thought about a little more sanding but I stopped.
I may sand some more.
If the Ole Man shakes his head when he comes in it may be  a lot of sanding and maybe some repainting.

It's a little more distressed than you can tell in the pictures above.
I think I'm liking it.
I'll let you know how it goes.

Thanks for stopping by.
Be Blessed!