Showing posts with label Autumn. Show all posts

Friday, September 30, 2016

DIY Vintage Fabric Pumpkins

Hey Ya'll 
&
Happy Fall to ya!
I hope that all is well with everyone and that the fall crafting bug has bit you too. I don't know why it has taken me so long to get this project done. I been wanting to do it for so long but I just never seemed to get around to it.
Well.. I finally did it and it's one of my favorites and it was so..sooo.easy!
It all started by saving last years pumpkins stems for the one we carved.
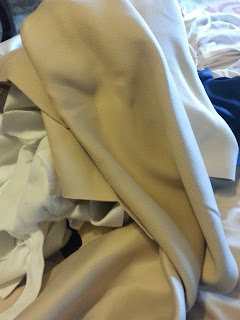
These pretty awesome fabric scraps I found in the scrap bin at work.
I have seen pumpkins done in all kind of wonderful fabric like velvet, ticking, burlap..and so on but I didn't have any that just screamed pumpkins to me.
Lol..I don't know why these did...
I really just thought the fabric had such a vintage feel. Especially, the green one, it reminded me of the drapes that hung in our babysitter Mrs. Hall's home.
I think that's one of the most important parts to doing true DIY's with vintage feel. It's finding fabrics in maybe unsuspecting placing and saying that would look great as..whatever your fancying. I suggest keeping an eye out at Goodwill and consignment type stores. Most the time there is some real funky kind of fabrics there that just need to be recreated.
As you know with me the main thing is to do it on the cheap! 

Yes..I'm sure I'm cheap!
The subject of me being cheap leads me to show you what I used as stuffing for these pumpkins.
I used my scrap fabric. 
You know it's got places or been cut to giblets to the point there's nothing to save. I find that it's the perfect stuffing for alot of the vintage-y crafts. It will be pretty heavy and lumpy.
I don't know why I find that to be about perfect for imperfect craft.
If it was something done way back in the day that's what they would have done.
Don't ya think?? 
Basically, lay your fabric out.
Then find something big and round for your pattern. I used my Rada Pizza Stone for the big green pumpkin.

I also got my thread and a pretty big needle and scissors.
You'll need to do some basting.


Baste stitch all the way around your circle edge.
Then gather. 
This is where it went a little wrong. When I started gathering. My thread broke. I could tell this was not going to be my option.
I needed something stronger that would hold.


So I pulled out the good ole dental floss.
It's very strong and it will work fine.


Gather and Stuff
After you stuff, Stick your stem in and pull the fabric tight around it.
I also tide some raffia around the stem. It sort of hides the gathers and just adds to the look.

That's about all there is to it.
I hope you'll give this DIY Fabric Pumpkin Project a try.
As always, thanks so much for stopping by for a visit.

BE BLESSED!


Thursday, August 4, 2016

Lingerings of Spring and Looking Towards Autumn


Hey Ya'll!
Are you feeling it like I am?
You know...the last days of summer fading fast 
as the reminders that the new approaching school year will soon be here.
For Us, it's only a week away. 
What becomes of the kids of summer?
I start feeling a bit melancholy. 
but 
I know that apple cider's and fall festivities are just around the bend.


Summer ends
and school begins
Good-bye dirty feet and dirty faces,
Autumn arrives,leafy drives,
Hello apple cider and candy corn.
On to the new season!

Friday, November 13, 2015

My Lazy Days Star Quilt


Hey! I'm Glad you came by for a visit.
 I'm also glad to finally be able to show you my Star Quilt I've been working on for a little while now. 
Right out of the gate, I must tell you I'm not the state fair kind of quilter or really any comparison to a good quilter. I just love quilts! My grandmother made them for everyone getting married or having a baby and some just because she thought you might need another. 

My grandmothers quilts were made of scraps she collected for worn clothing and various other places and she also tack quilted. She would have bags and bags of pieces cut and a few patterns drown somewhere. They were an extension of her love that she sewed on her Singer Pedal sewing machine.

My quilts are scrap quilts as well and fabric I just come along with. I don't tack quilt and I don't have quilting frame. I can't really devote the space to a huge frame. My style is just to throw them on the floor or across the bed and baste stitch it together. 
I can also be a bit lazy as quilting goes. My pieces are rather large. I know myself enough to know I don't always have the patients or the time.

This quilt I made for my own bed which is King size. So it's really quite a big quilt when speaking of quilts. 
It is typical of the quilts I've done in the past; there are pieces of old clothing, pieces from a few of Grandma's old chenille bed spreads, and some new( scrap) fabric that we make where I work. So all in all it is full of pieces of my life.

Thank you for stopping by 
and
letting me share my
 love of  a quilt 
with you.

BE  BLESSED!

Thursday, November 12, 2015

Farmer's Market Lawn Chair


Good Thursday Mornin' !
I hope everyone remembered our veterans yesterday. I sure appreciate our service men and women. I have many in my family. 
It's been quite hectic around here lately and I haven't been able to squeeze time for blogging or posting. Things are beginning to settle down a bit and I have been up to some more crazy crafting and recycling. I thought I'd chair my renewed lawn chair with you.


This project started with the Ole' Man saying, "Hey you don't want this do ya? I'm getting ready to haul it off?"
and 
to that I said, "Yeah, yeah, I do!"
I began with the thought of just using chair binding, the kind that's kind of burlapy with the red in it. I have bottomed straight back chairs with it in the past. I've always been able to pick it up in the craft department at Wal-mart but not anymore, at least not at ours. I didn't have the notion to put a full blown hunt for it so I went with a different option.


I sprayed the frame with flat  black spray paint after removing all the screws. Then I attached this very natural fabric I already had. It needed a little something else so I used a stencil to put my farmer's market lettering on.

It was a little hap-hazard in the coming along but I enjoyed this little project and I think in turn I have a enjoyable little chair to pull out.
I appreciate you stopping by for a little visit.
Be Blessed!


Wednesday, August 26, 2015

DIY Cover-Up

Hey there! 
This morning's cooler air has put me in the need of a little something for my shoulders. My summer dresses a tops are just needing a little more. So I decided to make this little cover-up.

My inspiration came from a cover-up purchased by my daughter earlier in the Spring. I have looked at it many times on the hanger thinking I needed something similar for myself and also at how easy it would be to mock it.

The material I chose to use wasn't a lace but it was very sheer and kind of gauzy material.

Using the other garment as a guide, I folded my new fabric in half and laid  the other on top 

against the fold.
After cutting out. I ended up with a 12" X 33" rectangle.
My cover-up is sized small. If you feel you need a larger garment add a 1/2 to 1" to the size of your rectangle.

I chose a piece of satin material for the armholes and the edge. 
I cut 2 piece 4" X 18" for the armhole, doubled it and base stitched it.
For the bottom edge, I  cut 2 pieces 4" X 30" and also doubled and base stitched.

If you already had a piece of trim or notion you could definitely use it instead of the satin material.

Sew it along both long edges of the material and center it on the sides. 
When you're done you'll have something like this.
Fold fabric with right face together and pin and sew your side seams.

Turn it.
That's all there is to it!

I think I have another piece of lace that would work great for this garment.
I think I need at least one more.

Thank you  for stopping by and checking out my 
DIY for today.

Be Blessed!

Monday, October 28, 2013

Our Monster Mash Food

I thought I'd share the foods we served-up at our 
Monster Mash Party.
Witch Fingers
How yummy...
Jump over to Summers Acres and grab my sister recipe.
Hawaiian Eyeball Punch
When Jessca from A Million Moments shared this recipe 
I knew this one was the one for us.


put a new twist to an old favorite.


I also made up a batch of
We also served up the usual
chips
and for us older bunch a
good cup of coffee 
to wash these sweets down.


Not complicated all fun.
Thanks for stopping by to check out our treats.
Be Blessed!

Take a Hay Ride~Monday Music Moves Me

It's Monday!
&
This is another 
Monday Music Moves Me.
It seems like everyone around here has got take a hayride
but me.
I'm positive if there was hay to get up they'd been here to pick me up 
but since that hasn't happened I'm taking my own kind of hayride.

Well...Come On! You're invited too.


Let's ride on by the Opry and  see what's going on down there.
                            
Listen to ole Flatt & Scruggs..you can't do nothin' with 'em boys.


You must be careful on a hayride. You don't want to fall into 
A Ring of Fire
                             

Then ya might end up in Jackson


Oh my...Archie's up to his tales.
                                 

Ho!.!  Get outta way Dan Tucker  this wagons rollin'
                               

I thankin' somebody been drankin'
Mountain Dew 
and maybe some
White Lightening
too.


Thanks for taking this ride with me 
but I've got to dance on outta here.
                               

BE BLESSED!

Sunday, October 27, 2013

The Monster Mash

My sister and I put together a little Autumn fun for our little bunch of monsters(kids). This is the third year we've got together as a family for some fall fun. 
The number of children are growing. We had a princess, a black ninja warrior, a character from the Hunger Games, a flannel wearing Spiderman, cowbody and cowgirl, one little wild man, some that have grown "too old" to dress up, and our sweet little lamb.
Jack was glad to have a helpful cowhand.


The kids decorated tiny pumpkin, and played a whole host of games like Boo Bingo, 
Mummy Wrap, 
and 
Bobbing for Apples.


I'll have to say there is a lot of fun to be had with 
a tub of water and some apples.


Even Roscoe wanted in on the fun.


Thanks for dropping in to spend some time 
with 
My Family & Friends.

BE BLESSED!


Wednesday, October 23, 2013

Jack and All His Friends

Well...No Silly!
Not my Jack,
Jack-o-lantern.

We've been getting a little more DIY going on around here.
Isn't it great when it's simple and cheap.
Wash-up & de-label some empty soda bottles
&
get you spray paint out.
Didn't I tell you I am no artist?
My first one I used way to heavy a hand.
After him, I sprayed much lighter and some I used a permanent marker on.
Yes, we stuck some here there....and everywhere.

I was out of bottles and we still wanted more,
so an old Maxwell House coffee jug work out.
Here's looking at ya!
Be Blessed!