Saturday, December 24, 2016

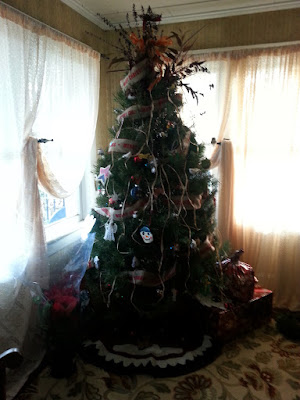
Country Christmas 2016


Hey ya'll!
I wanted to wish all of you a wonderful holiday season; 
one filled with family, friends, and plenty of home joys.
I hope your wreathes are hung. 
It could be you're like me and have a "wreath addiction."
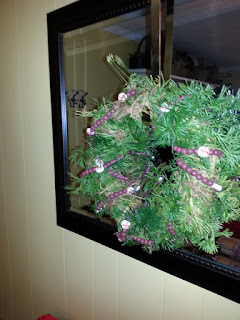
Jack made this one. He makes me happy when he wishes and asked to go to the woods with me. We just make them simple. Those are the ones I seem to prefer.
I'm keeping a a little Pioneer Woman love going with this beautiful Christmas tablecloth.
I'm never quite through until Christmas. I'll see some spot, I think needs one then I slip down in the woods to make them. I may be done at this point seeing as it's looking like quite the rainy day.
The Ole Man got me excited when he left out for work. He popped his head back in to tell me it was spitting snow. 
It was!
But it quickly turned to rain.
 I'm proud of this little plant here. The Ole Man gets me a poinsettia every year. Some years, they are more resilient than others. This one survived the the winter and the summer. When Autumn set in the leaves started turning the brilliant red. It's not full blown red but it's quite beautiful. I let a cold snap freeze out a little portion. Oops!
I added the rhododendron and a little this and that to disguise the zapped part.
  Here's ole St. Nick peeping out from one from this year. It's very red.


We put the fish in a big old pickle jar. We thought they needed some Christmas, too.

I couldn't help but make another country apron for the season.
I think this has lead me to the end of my post.
 It's Christmas Eve!
Jack & I have cookies to bake.


Merry Christmas!
Be Blessed!


Saturday, October 1, 2016

The Old Singer Pedal Sewing Machine and Some Other Retro Goodies

Hey Ya'll!
I hope everyone's weekend is shaping up nicely.

I thought I'd throw a quick post out on this beautiful Saturday evening.
I 'll be heading on to the work place in a little while but I thought I'd share some of my vintage loves 
that's become part of my home lately.

My Singer Pedal Sewing Machine is my new most favorite!
Like so much I won't to look at it and run my hand down it's worn grain.

I have a special love for them because I watched my Grandma Hylton sew on hers so often. All her quilt's were pieced on one so very similar.
Grandma's is still remains in the home it that it called home but now I have finally found one of my own.


I've found them before but opportunity didn't meet many before but all the stars aligned this time and I assume it was all meant to be.


Here it is as we unloaded it off the Ole Man's truck.
I came across it at a local sale that's put on in the community during Labor Day weekend.

It's was quite a find for me.


The cabinet is in a little better shape than Grandma's and the gold labeling is all in tact but much more worn than.
It's found it's home in the front room along with Priscilla, my dressform.


This little straight back chair isn't mine but I couldn't resist sharing what Mama had been up to.
The chairs were Grandma Hylton's as well but the seats had completely seen there better days 
so..
Mama put her hand too them with these new jute seats.
I think they are adorable!


Here's my ugly little lamp I picked up.


I couldn't resist because of the map shade.
LOL..the rest of it was ugly though.


This isn't much of a picture but here the lamp sets 
beside the wing back chair 
after a shot of the cheapest flat black spray paint 
that can be purchased.


Well..think..think..think..I can't remember anything else vintage-y 
to share at the moment.
I thank you for stopping by.

Be Blessed!


Friday, September 30, 2016

DIY Vintage Fabric Pumpkins

Hey Ya'll 
&
Happy Fall to ya!
I hope that all is well with everyone and that the fall crafting bug has bit you too. I don't know why it has taken me so long to get this project done. I been wanting to do it for so long but I just never seemed to get around to it.
Well.. I finally did it and it's one of my favorites and it was so..sooo.easy!
It all started by saving last years pumpkins stems for the one we carved.
These pretty awesome fabric scraps I found in the scrap bin at work.
I have seen pumpkins done in all kind of wonderful fabric like velvet, ticking, burlap..and so on but I didn't have any that just screamed pumpkins to me.
Lol..I don't know why these did...
I really just thought the fabric had such a vintage feel. Especially, the green one, it reminded me of the drapes that hung in our babysitter Mrs. Hall's home.
I think that's one of the most important parts to doing true DIY's with vintage feel. It's finding fabrics in maybe unsuspecting placing and saying that would look great as..whatever your fancying. I suggest keeping an eye out at Goodwill and consignment type stores. Most the time there is some real funky kind of fabrics there that just need to be recreated.
As you know with me the main thing is to do it on the cheap! 

Yes..I'm sure I'm cheap!
The subject of me being cheap leads me to show you what I used as stuffing for these pumpkins.
I used my scrap fabric. 
You know it's got places or been cut to giblets to the point there's nothing to save. I find that it's the perfect stuffing for alot of the vintage-y crafts. It will be pretty heavy and lumpy.
I don't know why I find that to be about perfect for imperfect craft.
If it was something done way back in the day that's what they would have done.
Don't ya think?? 
Basically, lay your fabric out.
Then find something big and round for your pattern. I used my Rada Pizza Stone for the big green pumpkin.

I also got my thread and a pretty big needle and scissors.
You'll need to do some basting.


Baste stitch all the way around your circle edge.
Then gather. 
This is where it went a little wrong. When I started gathering. My thread broke. I could tell this was not going to be my option.
I needed something stronger that would hold.


So I pulled out the good ole dental floss.
It's very strong and it will work fine.


Gather and Stuff
After you stuff, Stick your stem in and pull the fabric tight around it.
I also tide some raffia around the stem. It sort of hides the gathers and just adds to the look.

That's about all there is to it.
I hope you'll give this DIY Fabric Pumpkin Project a try.
As always, thanks so much for stopping by for a visit.

BE BLESSED!


Friday, September 16, 2016

Family Reunion and a Potluck Meal

Happy , Happy Friday to you!
I'm not as excited about the fact that it's Friday as I am about the family get-together tomorrow with the my family on my Mama's side. We don't call it a reunion but I suppose that's what it really is. It's really just Mama's brother's and the children and the grandchildren and great-grandchildren and so on!
My mother was the youngest of eleven. All the sisters and quite a few of the brothers have passed away. 
I think the reason we don't call it a reunion is because it is something that we have always done!

Our family is somewhat unique and close! 
When my Grandma was alive it was an every Saturday thing;
and 
everyone showed up. 
I guess you could say we communed as a family as it had always been.

There was absolutely nothing fancy but oh..how beautiful it was.
It still is for us now. 
My Mama and Daddy live at the homeplace now and that's where we all continue to gather once or twice a year. It's kinda of amazing there's always a bitter sweetness for the ones that have gone and the looks on the faces of the ones that are left but oh man...has one family grown. 

Now use to Grandma did the cooking every Saturday!
I mean a electric and a wood cook stove and two tables full of prepared food.
Lol..even if it was 80 degrees outside that wood cook stove was cranking!
Grandma was amazing and there was nothing like her.
It takes all of us these days. Mama cooks up a mess of stuff and everyone brings a dish or two but if you don't have the time or just don't cook don't worry there is always plenty.

Now that leads me to figuring out what I'm bringing. That can get hard because we all know certain things get claimed quickly. Don't even think about deviled eggs or chicken. 
I'm thinking I'm going to dumpling up.

I think I'll take my Turkey Dumpling Casserole.

The dessert I've chosen will be Apple Dumplings. They are dumplings but completely different than the casserole. Lol..I don't think I even have a picture. I will try to get some pictures and a recipe for those. they are very good.
I also think I'm going to try this new little dish I had pinned on Pinterest. 


I think I had a version of it at a dinner at work one time
and 
it was very, very good.
This is a recipe from Manila Spoon.
Check her site out. It's pretty awesome.

I'll definitely try to take some pics of what I come up with.
I am the worse to tweek and change a recipe so it's always a little different.

I hope everyone has a wonderful weekend.
Be Blessed!

Friday, August 5, 2016

Winner Winner Chicken Dinner


Well, It's time to announce the winner for the Dragnonfly brooch.
The winner is ..Nobody....Lol..I never imagined that absolutely no one would enter.
I guess I'll leave it there. Nothing more to say.

Thursday, August 4, 2016

Lingerings of Spring and Looking Towards Autumn


Hey Ya'll!
Are you feeling it like I am?
You know...the last days of summer fading fast 
as the reminders that the new approaching school year will soon be here.
For Us, it's only a week away. 
What becomes of the kids of summer?
I start feeling a bit melancholy. 
but 
I know that apple cider's and fall festivities are just around the bend.


Summer ends
and school begins
Good-bye dirty feet and dirty faces,
Autumn arrives,leafy drives,
Hello apple cider and candy corn.
On to the new season!

Wednesday, July 27, 2016

It's a Magnabilities Givaway!

Good Mornin!
I'm excited to feature a Magnabilities Giveaway!

This set includes: Dragonfly - Bittie Pin/Brooch - Antique Silver (MP1001), Bittie Ladybug- Silver (IN1834s) and Bittie Turquoise Twirl (IN1888s)

Item #: SP1176
 Price$25.00               
This Giveaway begins TODAY!
It ENDS at 12:00 am on August 5, 2016!
I'm looking forward to seeing who all will join in the fun.

Be Blessed!

a Rafflecopter giveaway

Monday, July 18, 2016

Magnetic Monday


Good Monday Mornin'!

I hope everyone had an especially nice weekend. We did around here. We weren't up to anything very outrageous but it was sure nice to have the time off from work. We did enjoy a very nice family get-together at my sister house. She invited all the family down to a cookout especially for their son Ryan who had came in on leave from the Navy. 
You can't beat a good burger and a dog!


I also got off the fence and signed up to be a Magnabilities Consultant. A friend at work introduced me to this custom jewelry line. I started with a necklace/insert combo for my Mama for Mother's Day.
I'm often hooked with a gift I can add to later!

The brochure was full of all kind of necklace, bracelet and even ring combinations. Choices of several varieties of inserts, pendants, chain length's and styles. The options are totally endless.
I was wooed in with this necklace I'm showing here.
You know it!! 
Honeybee!!
Then I learned I could download any picture I wanted and make it into custom pieces.
How cool is that!

Well Mama's birthday is coming up so I thought I'd get her some to add on to her necklace; 
of course 


                    I wanted to add to mine, too...
So I figured I may as well join up with Magnabilites.
I could see I had already formed some kind of love affair...
                    .....so I did..


Now I've downloaded my barn picture. 
I photographed this barn a few years ago and it's been one of my favorite pictures I've ever taken. I have thought of having it framed or something to display in the house
but 
nothing was ever quite right.
I think this was a great option.


Pretty cool I thought!

Now, I've shared what's had me fascinated this weekend.
What has been your attractions lately?

I thank you for stopping by.
Be Blessed!

Wednesday, June 29, 2016

Lace-Back Bra DIY


Hey, Ya'll!
I thought I'd show ya my Lace-Back Bra DIY.
I've had my mind to do something like this for  sometime now. The opportunity finally arose when I came across this wide band lace that was fairly close in color to my favorite worn out bra.

Isn't it terrible to hold on to such things?
I was almost ashamed to write this one for having to admit to keeping things that are so raggedy but here I am sharing.
You can buy pricey lace back or fancy bras but they usually come with a pretty good price,
so..
why not see
 how this will turn out?
I think this will be a nicer look with some of the low back or very thin summer shirts,
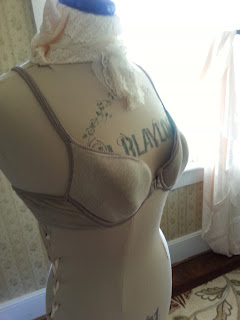
I started out by pinning the old bra onto Priscilla.
I then pinned the lace to the old bra where I intended to cut the old bra away.
I will say to pull your lace just a bit to make sure it will have a snug fit and hold things in place the way it should.
Once everything is pinned clip away the old back.
Also, my lace was on the wide side and I didn't want it to ride to high under my armpit so I put a dart on the side to get it down to size around the cup.
I machined sewed the back.
When sewing around the cup 

 I base stitched and went back with a whip stitch on both inside and outside seam.

And there you have it!
One lace back bra DIY/Upcycle!


I hope you're inspired to try one of your own.
Thank you for stopping by.

BE BLESSED!

Monday, June 20, 2016

Star Covered Cherry Pie

Hey Ya'll!
I hope you've all had a wonderful Father's Day Weekend.
I sure did!  
I baked up a simple cherry pie, I thought I'd share with you.
Star Pie Recipe

This is just a no-brainer kind of recipe. I just tweeked my basic 2-crust pie shell  with a little bit of granulated sugar and a sprinkle of cinnamon.

I generally use the Crisco Butter flavored shortening. It always proves to give me good butter results. I am still using White Lilly All Purpose flour these days. I can't seem to remember to pick up some Martha White when I'm in a neighboring county. 
I'm not quite sure why neither grocer we have here in Stuart will offer Martha White All Purpose but until they do White Lilly is the next best thing.


I really enjoy making pie crust. I think it's probably the kid in me. I'm the get in there with your hands kind of girl.
Just cut your shortening in until it's about the consistency of cornmeal.
That's about the texture I like to see.


Take note to use ice water. Your shortening will work a little more to your liking as well if it's chilled just a bit. Just enough to take the smushiness out.
You've added enough water when your dough will sort of follow you around the bowl and sticks together. If it's too moist it will be difficult to work with.


Form into a ball and divide in half.
Fold up your dough, set it in my pie dish and fluted the edges.

I filled up my pie with ready made cherry pie filling and topped with cut out stars from the crust . In the oven at 425 degrees for about 45 minutes or until it's nice and golden.

The funny thing about this whole pie was my anger that was congered up when I put the large can of Duncan Hines Comstock Pie filling in my pie to find it was barely there. I had used this product for a long time but it simply was not enough to fill my pie. 
So...
I grab my purse and run for the nearest grocery store.(not Walmart but Lowes) to find that they don't even carry that brand at all nor do they carry a large can at all.
So... 

I purchase two regular cans of Lucky Leaf  and as luck would have it they were not the same cherries. The Comstock were bright red and the lucky leaf were dark.
So..I just kind of stirred them around om the pie.
I suppose alls well that ends well!
Have you ever had a simple pie not be so simple?

Thanks  for stopping by and sharing a little bit of pie with me.
As always
Be Blessed!